How to Install WordPress on a VPS Hosting Server – Choosing a Virtual Private Server (VPS) for your WordPress website offers unparalleled control and flexibility compared to shared hosting. However, setting up WordPress on a VPS requires a more hands-on approach. This detailed guide will walk you through the entire process, from initial server setup to securing your WordPress installation. We’ll cover essential aspects like choosing the right VPS provider, setting up your server environment, installing WordPress manually, and optimizing for performance and security.
This guide is designed for users with some technical familiarity, but we’ll explain each step clearly and concisely.
Choosing Your VPS Provider and Plan
Selecting the right VPS provider is crucial for your WordPress website’s success. Consider factors like:
- Server Location: Choose a location geographically closer to your target audience for reduced latency and faster loading times. Consider using a CDN (Content Delivery Network) for global reach.
- Server Resources: RAM, CPU, and storage space are vital. The requirements depend on your website’s anticipated traffic and resource needs. Start with a plan that can comfortably handle your current needs, with room for scaling.
- Control Panel: Some providers offer control panels like cPanel or Plesk, simplifying server management. Others require command-line interface (CLI) access, which demands more technical expertise.
- Customer Support: Reliable and responsive customer support is essential, especially when encountering technical issues.
- Pricing: Compare pricing plans from different providers, considering the features and resources offered.
Popular VPS providers include:
- DigitalOcean
- Linode
- Vultr
- AWS (Amazon Web Services) – EC2
- Google Cloud Platform (GCP) – Compute Engine
Setting Up Your VPS Server Environment
Once you’ve chosen a provider and plan, you need to set up your server environment. This typically involves:
1. Connecting via SSH
Secure Shell (SSH) is a secure protocol for connecting to your server remotely. Your VPS provider will provide you with the server’s IP address and your login credentials. You’ll need an SSH client (like PuTTY for Windows or the built-in terminal on macOS/Linux) to connect.
2. Choosing an Operating System (OS)
Most VPS providers offer various operating systems (OS). For WordPress, Ubuntu Server is a popular and well-supported choice. Other options include CentOS, Debian, and Fedora.

Source: greengeeks.com
3. Updating the System, How to Install WordPress on a VPS Hosting Server
After connecting, update your OS’s packages to ensure you have the latest security patches and software versions. For Ubuntu, use the following commands:
sudo apt update
sudo apt upgrade -y
4. Installing a Web Server (Apache or Nginx)
A web server is necessary to serve your WordPress website. Apache and Nginx are popular choices. For Ubuntu, you can install Apache using:
sudo apt install apache2 -yFor Nginx, use:
sudo apt install nginx -y5. Installing MySQL or MariaDB
WordPress uses a database to store its content. MySQL and MariaDB are popular database management systems (DBMS). Install MySQL on Ubuntu using:
sudo apt install mysql-server -yRemember to secure your MySQL installation after installation. Refer to your MySQL documentation for detailed instructions.
6. Installing PHP
WordPress is written in PHP, a server-side scripting language. Install PHP and necessary modules (like `php-mysql`, `php-curl`, `php-mbstring`, `php-xml`, `php-gd`) using:
sudo apt install php php-mysql php-curl php-mbstring php-xml php-gd -yInstalling WordPress Manually
Now, you’re ready to install WordPress manually. This involves:
1. Downloading WordPress
Download the latest version of WordPress from the official WordPress website: https://wordpress.org/

Source: hostitsmart.com
2. Extracting the WordPress Files
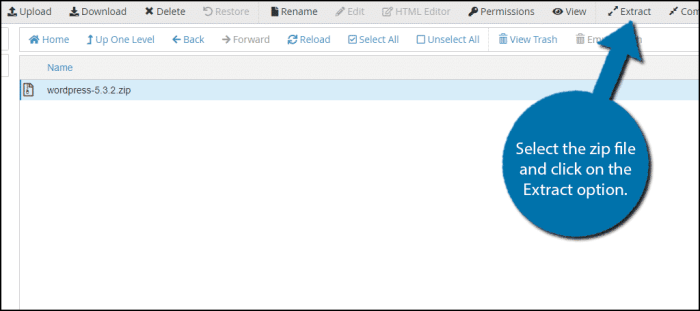
Extract the downloaded ZIP file. You’ll need to create a directory for your WordPress installation, typically within your web server’s document root. The exact location depends on your web server configuration. For Apache, it’s often `/var/www/html`. You can use the following commands:
sudo mkdir -p /var/www/html/wordpress
sudo tar -xzvf wordpress.tar.gz -C /var/www/html/wordpress
3. Creating a MySQL Database and User
Use the MySQL command-line client to create a database and a user with appropriate permissions. Remember to replace the placeholders with your chosen values:
mysql -u root -p
CREATE DATABASE wordpress_db;
CREATE USER 'wordpress_user'@'localhost' IDENTIFIED BY 'your_strong_password';
GRANT ALL PRIVILEGES ON wordpress_db.* TO 'wordpress_user'@'localhost';
FLUSH PRIVILEGES;
exit
4. Configuring the wp-config.php File
Create a `wp-config.php` file in your WordPress directory. You can copy the `wp-config-sample.php` file and modify it with your database credentials. The file will contain database connection details.
5. Running the WordPress Installation Script
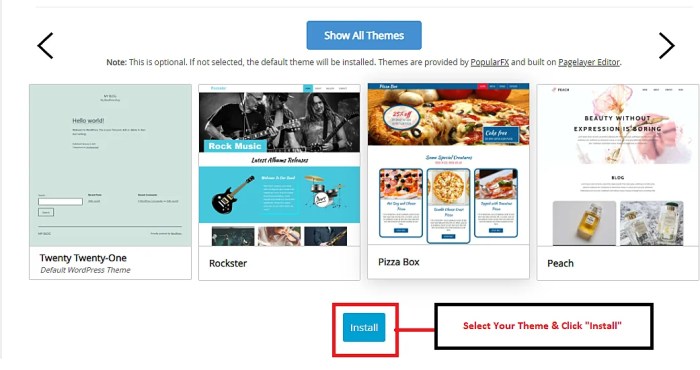
Access your WordPress installation through your web browser (e.g., `http://your_server_ip/wordpress`). Follow the on-screen instructions to complete the WordPress installation.
Securing Your WordPress Installation
Securing your WordPress installation is paramount. Consider these steps:
- Strong Passwords: Use strong and unique passwords for your WordPress admin account and database user.
- Regular Updates: Keep WordPress, themes, and plugins updated to the latest versions to patch security vulnerabilities.
- Security Plugins: Install a reputable security plugin like Wordfence or Sucuri Security.
- Firewall: Implement a firewall (like ufw on Ubuntu) to protect your server from unauthorized access.
- SSL Certificate: Install an SSL certificate (HTTPS) to encrypt communication between your website and visitors.
- Regular Backups: Regularly back up your WordPress website and database to protect against data loss.
Optimizing WordPress for Performance
Optimizing your WordPress website for performance ensures fast loading times and a positive user experience. Consider these strategies:
- Caching: Use a caching plugin (like WP Super Cache or W3 Total Cache) to reduce server load and improve page speed.
- Content Delivery Network (CDN): A CDN distributes your website’s content across multiple servers globally, improving loading times for users in different locations.
- Image Optimization: Optimize your images to reduce their file size without sacrificing quality.
- Database Optimization: Regularly optimize your WordPress database to remove unnecessary data and improve performance.
Frequently Asked Questions (FAQ)
- Q: What are the minimum server requirements for WordPress on a VPS?
A: The minimum requirements depend on your website’s traffic and complexity, but generally, 1GB RAM, 1 CPU core, and 20GB SSD storage are a good starting point. - Q: What is the difference between Apache and Nginx?
A: Both are popular web servers. Nginx is generally known for its performance and efficiency, especially under high traffic loads, while Apache is known for its ease of use and extensive module support. - Q: How do I access my server via SSH?
A: Your VPS provider will provide you with your server’s IP address and login credentials. You’ll need an SSH client (like PuTTY or Terminal) to connect using the command `ssh your_username@your_server_ip`. - Q: What if I encounter errors during the installation process?
A: Carefully review the error messages, check your server configuration (database credentials, file permissions), and consult your VPS provider’s documentation or support. - Q: How often should I back up my WordPress website?
A: It’s recommended to back up your website and database regularly, ideally daily or at least weekly.
Conclusion
Installing WordPress on a VPS offers significant advantages, but it requires technical expertise. This guide provides a comprehensive overview of the process, from server setup to security and optimization. Remember to carefully follow each step and consult additional resources if needed. By taking a proactive approach to security and optimization, you can ensure your WordPress website runs smoothly and efficiently on your VPS.
Call to Action: Ready to take control of your WordPress website? Start your VPS journey today by choosing a reputable provider and following the steps Artikeld in this guide!
Q&A: How To Install WordPress On A VPS Hosting Server
What are the benefits of using a VPS for WordPress?
VPS hosting offers greater control, scalability, performance, and security compared to shared hosting. You have root access, allowing for extensive customization and optimization.
What technical skills do I need?
Basic server administration knowledge (SSH, FTP) is helpful but not strictly required. This guide provides clear instructions to guide you through the process.
What if I encounter problems during installation?
Consult your VPS provider’s documentation or search online forums for solutions. Many common issues have readily available solutions.
Do I need to manage server security myself?
Yes, you are responsible for the security of your VPS. This includes regular updates, firewall configuration, and employing strong passwords.
How do I back up my WordPress website on a VPS?
Use plugins like UpdraftPlus or BackWPup to create regular backups. You should also consider backing up your database and files manually.